By The Frogfather
Fruit fly cultures tend to accumulate a small mountain of disposable climbing material. Once you are making fresh cups regularly, it is reasonable to wonder whether that part of the routine could be reused.
That question led to our experimental fruit fly inserts at Frogfather HQ. The useful discussion is about how an insert fits the culture and whether it remains practical through repeated use. A neatly printed shape on a desk is only the beginning.
This guide explains what a reusable insert is intended to do, what to inspect before using one and how to test it without putting your entire feeder supply behind an unproven idea. There are no invented yield figures or promises that one geometry will transform every culture.
Quick answer
A fruit fly insert provides additional accessible surfaces inside a culture. It does not replace the food medium, ventilation or good starter flies. Choose a design that fits the container, can be inspected and cleaned, and is printed from an appropriate known material.
Trial it in a small part of your culture rotation. Keep a familiar method running alongside it, record results and inspect the insert between uses. Cleaning does not automatically establish sterility, and a reusable item should be retired if damage or inaccessible contamination makes continued use doubtful.
Separate the food medium from the climbing structure
In a culture, the prepared medium is the food and developmental environment used by the larvae. The climbing structure is a separate physical feature within the cup. Confusing them makes comparisons difficult.
Wood wool, suitable paper structures and reusable inserts can occupy similar practical roles as additional surfaces, but their shapes, absorption and accessibility differ. Changing that structure may alter how the keeper handles the cup, even when the food recipe remains the same.
An insert cannot compensate automatically for unsuitable medium moisture, poor starter stock, an insecure lid or inappropriate storage. Those fundamentals still matter. Carolina Biological Supply’s culture guidance, for example, treats suitable containers, moist food and ongoing culture renewal as separate requirements [1].
For the wider routine, use our complete fruit-fly culture guide. This article stays with the structure you put inside the cup and how you assess it.
What our experimental designs are intended to offer
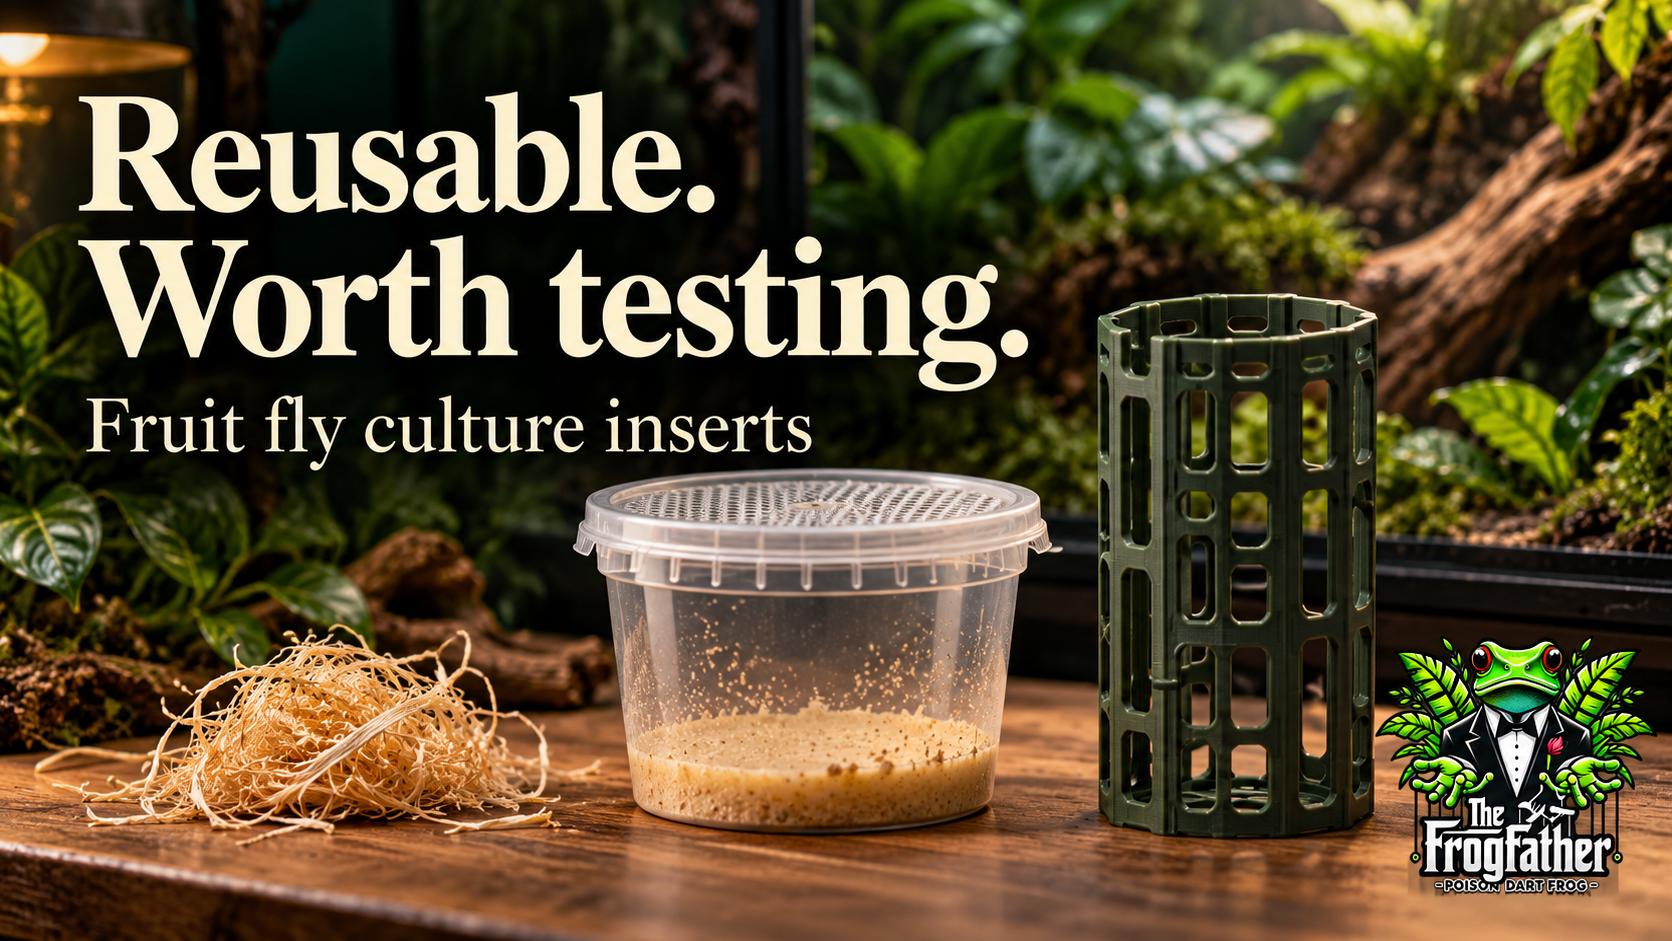
The Frogfather Diamond, Mesh and Spiral files explore different reusable geometries. The aim is to provide accessible climbing and resting surfaces while allowing the keeper to remove, inspect and clean the structure between culture cycles.
The Diamond design uses open panels with diamond-shaped openings. Its listing describes it as experimental and recommends PETG printing. The intended benefits are design objectives, not a published demonstration of superior fly production [2].
The Mesh and Spiral alternatives let keepers explore other arrangements. Their names describe the designs, not a ranking of performance.
None of the files should be presented as a guarantee of mite prevention, mould control, healthier frogs or a particular increase in yield. Those are separate claims that would need appropriate evidence.
Fit the cup before judging the shape
Measure the actual container you will use, including its taper and the space beneath the lid. A design that fits one nominal cup size may not fit another supplier’s container.
Check that the insert can be placed and removed without bending the cup or disturbing its closure. It should not force the lid upwards, obstruct ventilation or create a route through a poorly fitting rim.
Consider the amount and depth of prepared medium. An insert positioned in a shallow cup may behave differently from the same print buried deeply in a larger volume. Record the arrangement during a trial rather than assuming that the file alone defines the whole setup.
Leave practical access for seeding and harvesting flies. If feeding becomes awkward or removal scatters old medium across the work area, that matters even if the insert photographs beautifully. Husbandry equipment earns its place during use and cleaning.
Inspect the finished print carefully
A successful print is more than a model that reaches the end of the job. Examine the finished item in good light before it enters a culture.
Look for loose strands, incomplete surfaces, poorly bonded sections and sharp projections. Check that intended openings are actually open. Remove loose material safely and discard a print with structural defects that cannot be corrected reliably.
Do not install an insert containing trapped support material or fragments that will break away during washing. Avoid modifications that introduce inaccessible cavities or a brittle joint just to reduce print time.
Record the file version, material and relevant print settings. If a later print behaves differently, those details help identify whether the change concerns the geometry, the material or the way it was manufactured. Two objects printed from the same file are not automatically equivalent finished products.
PETG is a material choice, not a safety certificate
PETG is a commonly used printing material with properties that can make it useful for practical parts. The filament maker’s information remains important because additives, formulation and printing conditions vary.
Prusa’s PETG guidance distinguishes the properties of the polymer from concerns associated with layered printed objects [3]. That is a useful reminder not to describe every PETG print as automatically food-safe, sterile or validated for feeder cultures.
Use a known filament and retain its details. Avoid assuming that decorative, filled, recycled or unusually formulated materials have the same suitability as a documented standard filament. An attractive colour does not establish chemical compatibility or long-term performance.
Do not add an unverified coating to make a print seem safer. Coatings introduce their own questions about curing, damage, cleaning and exposure. If the material or process is uncertain, keep it out of the livefood routine until that uncertainty is resolved.
Cleaning begins when a culture is retired
Plan how you will manage the old culture before pulling out the insert. Used medium, insects and contaminated tools should not spread across the clean preparation area.
Keep retired cultures separate from fresh supplies. Follow suitable contained disposal guidance for unwanted livefood and medium; do not release culture contents outdoors or wash live insects into drains. Your supplier can advise on an appropriate disposal process for the culture involved [1].
Remove the insert over a dedicated work area. Use a tool that can reach its surfaces without damaging the print, and separate loose old material before attempting a more thorough wash.
If the print is too difficult to empty or repeatedly retains inaccessible residue, record that as a design problem. Reusability is a practical property of the whole cleaning routine, not something established merely by using plastic instead of paper.
A cautious cleaning workflow
Use cleaning products and water temperatures compatible with the actual filament and finished print. The following sequence is a practical starting framework, not a validated disinfection protocol.
- Remove loose used medium and visible debris in a dedicated dirty area.
- Wash accessible surfaces using a material-compatible process, with a brush that reaches the openings and corners.
- Inspect both sides and internal spaces in good light. Repeat physical cleaning where material remains.
- Rinse thoroughly to remove loosened debris and any cleaning product used.
- Allow the insert to dry appropriately, then inspect for cracks, distortion and remaining deposits before storage or reuse.
Do not assume that a dishwasher, boiling water, an oven or a chemical soak is suitable. A filament’s printing temperature does not tell you which cleaning exposure the finished item can tolerate.
Cleaning removes material [4]. It does not prove that every microorganism or pest stage has been eliminated. Where contamination changes the purpose of the work, choose a verified process or replace the item rather than escalating an improvised treatment.
Know when to retire an insert
Discard a print if it develops cracks, delamination, persistent inaccessible residue or a deformation that affects fit. A part that repeatedly sheds fragments is also unsuitable for continued use.
Colour change alone may have several causes, but it should prompt inspection rather than an automatic assumption that the item is either harmless or dangerous. Consider the material history, cleaning process and condition of the surface.
If a design is cheap to print but takes excessive effort to clean properly, replacement with another method may be more practical. The aim is dependable feeder husbandry, not proving that a chosen print can be kept indefinitely.
Record the number of completed cycles before retirement if you are evaluating durability. Without that record, statements such as ‘lasts for ages’ are difficult for another keeper to interpret or compare.
Trial an insert without risking your food supply
Keep most of your established culture routine unchanged while testing a new structure. Retain productive cultures using your familiar method so that an unsuccessful trial does not become a feeding emergency.
Start trial cultures with comparable containers, medium batches and storage conditions. Use starter flies from comparable healthy stock. Record how the inserts were positioned and whether the cups were started at similar times.
If possible, compare more than one cup per method and repeat the comparison across different starts. One excellent or poor culture can reflect variation unrelated to the insert.
This is a practical keeper comparison, not a controlled scientific study. It can still produce useful observations if the limitations are explicit. Avoid presenting a few cups on one shelf as proof of a universal biological advantage.
Decide what you are trying to measure
Different questions need different records. If the question is cleaning effort, record the time and steps required to reach an acceptable inspected condition. If it is ease of harvesting, describe the method and any difficulties.
For production comparisons, decide in advance how you will estimate output. A photograph of a crowded lid is not necessarily a count of emerged adults. It can be influenced by when the photograph was taken and where flies were gathering.
Record outcomes such as first observed emergence, approximate harvests using a consistent method, culture retirement and visible problems. Do not interpret an earlier observation automatically as a shorter developmental period if observation times differed.
Separate measurements from impressions. ‘This cup was easier for me to handle’ is a useful practical report. ‘This design produces healthier flies’ is a biological claim requiring a different kind of evidence.
Troubleshooting a disappointing trial
If a trial cup produces poorly, inspect the medium, starter stock, lid, storage conditions and insert arrangement. The print is one possible factor, but not the only change that may have occurred.
If several methods fail together, review shared factors before redesigning the insert. A common medium batch or storage problem can affect every cup on the shelf.
If only the new setup has problems, document differences such as the space occupied, wet material trapped against the structure or difficulty harvesting. Change one main feature on the next small trial rather than altering the medium recipe, print and temperature simultaneously.
Our poor fruit-fly production guide and mould-in-cultures guide provide the broader troubleshooting routes.
Keep culture equipment separate from animal housing
An insert is designed for use in a feeder culture. It should not automatically become a hide, a feeding station or an enrichment item inside a frog enclosure. Those uses introduce different fit, access and animal-safety questions.
Do not return equipment or surplus feeders from an occupied vivarium to a production culture. Keep preparation tools and used-enclosure tools separate. If several cultures or strains are maintained, labels and orderly handling reduce avoidable mixing.
Contain the flies during transfer and use a secure lid suitable for the culture. An insert does not make an unsuitable lid escape-resistant. Our guide to escaped fruit flies covers that separate problem.
The welfare purpose remains a reliable supply of appropriate livefood. Experimental equipment should support that routine, not make frog feeding depend on the success of a new prototype.
Does reusable automatically mean more sustainable?
A reusable insert may reduce the amount of disposable climbing material used. That is a plausible practical benefit to measure, but it does not establish the total environmental impact of the product.
Printing material, failed prints, electricity, cleaning water, cleaning products, lifespan and disposal all contribute to the comparison. This article does not claim a completed life-cycle assessment or a verified carbon saving.
Keep a record of what is actually avoided and what is consumed. If one insert completes several useful cycles, note those cycles and the disposable material it replaced. If it fails early or requires excessive cleaning, record that too.
This makes sustainability a question you can investigate rather than a decorative adjective attached to every reusable object.
Choose the method that earns its place
Reusable inserts are worth exploring because they address a real repeated task. Their value will depend on fit, handling, cleanability, durability and culture performance in the keeper’s own routine.
Start small, retain a reliable feeder reserve and document what happens. If a design is useful, those records will explain why. If it needs changing, they will show where to begin. Either outcome is more helpful than declaring a winner before the cultures have done the work.
References and further reading
The checking and management workflows are practical editorial guidance. Manufacturer documents apply to their stated equipment; general horticultural and biosecurity sources do not validate every vivarium application.
- Carolina Biological Supply — Drosophila care guide. Culture medium, containers, renewal and contained disposal; no claim validating a printed insert.
- The Frogfather — Experimental Diamond insert. Design intent and PETG recommendation; commercial primary source, not comparative performance evidence.
- Prusa Research — PETG material guide. Material properties and distinction between polymer and printed item; not amphibian-safety certification.
- CDC — Cleaning and disinfecting pet supplies. General separation of cleaning and disinfection. No universal chemical or heat protocol is prescribed.